This guide provides a comprehensive overview of the :confirmable module in Devise for Ruby on Rails applications, emphasizing its role in enhancing security by verifying the ownership of the email address registered by a user. The Devise :confirmable module prevents the creation of spam accounts, bolsters the security of user data, and ensures that an account will only be activated once the user has confirmed access to the registered email address.
In this guide, you will also find a step-by-step process on how to add the :confirmable module to an existing Devise setup in your Ruby on Rails 7 application. It details the necessary modifications in the model, updates required in the database, optional changes in the Devise views, and adjustments to the Devise mailer configuration. It also underlines the importance of restarting your Rails server for the changes to take effect.
Whether you’re a beginner or experienced Rails developer, this guide offers insights and practical steps to enhance the email confirmation functionality of your application’s authentication system using Devise.
The :confirmable module
The :confirmable module in Devise is responsible for verifying whether an email address belongs to the user who registered it. It’s a common security feature that helps reduce the risk of spam accounts and improves the security of user data.
When a user signs up, the :confirmable module generates a unique confirmation token and sends an email to the user with a link containing this token. The account will not be active until the user clicks this link, thus confirming that they have access to the email address they registered with.
Here’s a breakdown of how it works:
- Upon signing up, the user is inactive until they confirm their email.
- Devise sends a confirmation email containing a link with a unique confirmation token.
- The user clicks the link, which sends a request to the server with the token.
- The server checks if the token matches the one stored in the database for the user.
- If the token matches, the user is confirmed and their account becomes active.
- If the token doesn’t match or has expired, the user remains unconfirmed and another confirmation email needs to be sent.
- The :confirmable module also provides the ability to resend confirmation instructions if the user didn’t receive the original email, and the :reconfirmable feature which requires users to confirm their email again after changing it.
Remember, for :confirmable to work properly, you need to have a way to send emails set up in your Rails application, as Devise relies on ActionMailer to send the confirmation instructions.
Here are the step by step instructions to add :confirmable to Devise
Step by step instructions on adding confirmable to an existing Devise user auth Ruby on Rails 7 set-up.
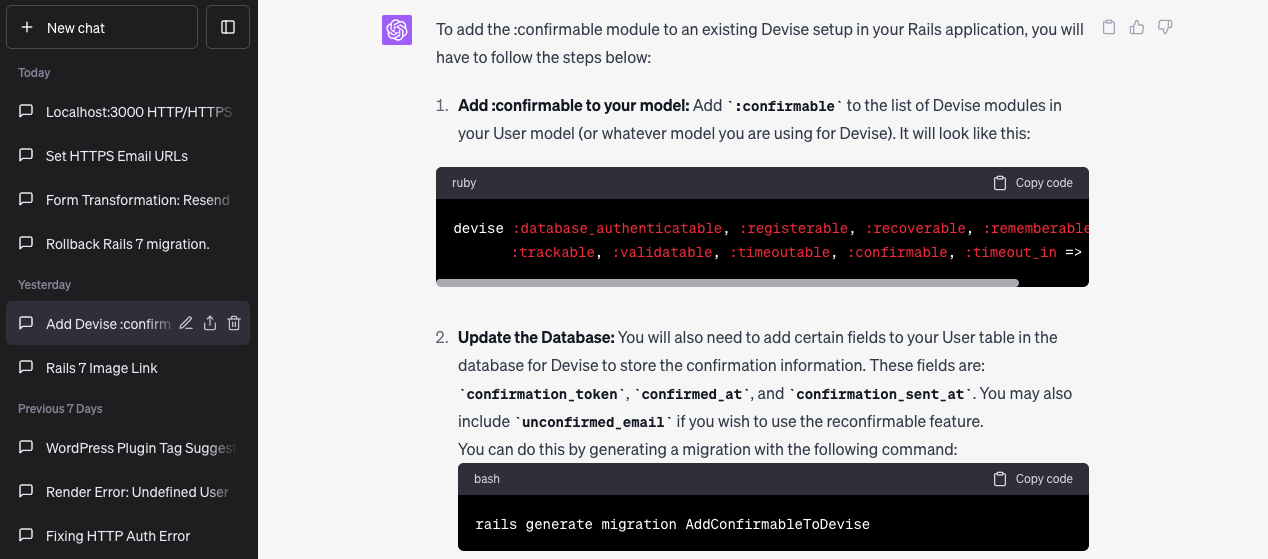
- Add :confirmable to your model: Add :confirmable to the list of Devise modules in your User model (or whatever model you are using for Devise). It will look like this:
devise :database_authenticatable, :registerable, :recoverable, :rememberable,
:trackable, :validatable, :timeoutable, :confirmable, :timeout_in => 4.hours- Update the Database: You will also need to add certain fields to your User table in the database for Devise to store the confirmation information. These fields are: confirmation_token, confirmed_at, and confirmation_sent_at. You may also include unconfirmed_email if you wish to use the reconfirmable feature.
You can do this by generating a migration with the following command:
rails generate migration AddConfirmableToDeviseThen, open the generated migration file in your text editor and fill it out like this:
class AddConfirmableToDevise < ActiveRecord::Migration[7.0]
  def up
    add_column :users, :confirmation_token, :string
    add_column :users, :confirmed_at, :datetime
    add_column :users, :confirmation_sent_at, :datetime
    add_column :users, :unconfirmed_email, :string # Only if using reconfirmable
    add_index :users, :confirmation_token, unique: true
  end
end
Run the migration using the command bin/rails db:migrate.
- Update Devise Views (Optional): If you have custom Devise views, you’ll need to make sure that they include the necessary form fields for unconfirmed users to confirm their accounts. If you’re using the default Devise views, you can skip this step.
- Configure the Devise Mailer: Ensure that you have set up your Devise mailer in your environment files (config/environments/development.rb and config/environments/production.rb). Here’s a basic setup:
# development
config.action_mailer.default_url_options = { protocol: 'http', host: 'localhost:3000' }

# production
config.action_mailer.default_url_options = { protocol: 'https', host: 'affyex-devise-users.herokuapp.com' }
Replace ‘localhost’ and 3000 with your own host and port.
- Restart your Rails server: If your Rails server was running while you made these changes, you’ll need to restart it for the changes to take effect.
