The following will be an in-depth article on how to set-up a WordPress Site. There are a few things that you really will need. Really you need a hosting service and a domain to set it up under, beyond that you are golden. I am going to give you a step by step, here goes…
Download WordPress
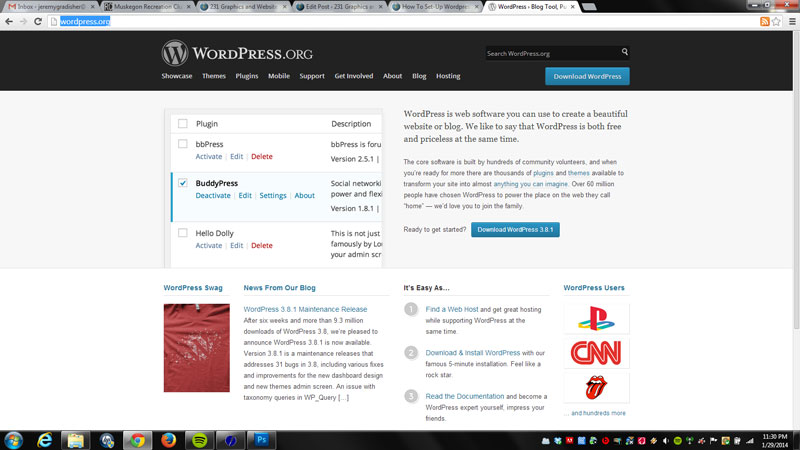 I prefer to start with downloading what you need. Download WordPress at WordPress.org – Once you have the package, un-zip it and upload it to where you need it on your server. I like to do this first as it will take a few minutes to upload through FTP, so there are a few things that I can get accomplished while I am doing this. When you unzip it it will be in one folder, open that and upload what is within that folder to the root directory of the domain where you will be hosting your new website.
Create Your Database and Database User
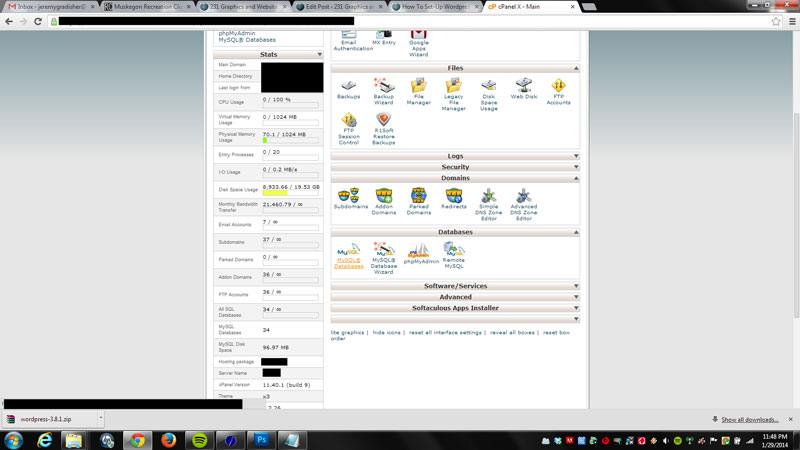 WordPress is a content management system that builds a website that uses a combination of HTML, CSS, PHP, and Javascript. It stores and passes information back and forth from a database on your server with MySQL. Once you have uploaded the files that you need for the CMS you need to create that database, and you will also need a database user. Log-in to C-Panel, use MySQL Databases about half way down to create what you need.
Create the Database
 Towards the top you will see an input field that says create database. Decide what you want it to be called. Depending on your server you will have different ways to name it, but overall it will be simple. I like to make mine obvious and name it something that will allow me to recognize it immediately. Once created it will lead you to a screen which says something to the extent of: Added the database “xxxxxx_xxxxxx”. I always save that to a text file because you will need that information later.
Create the Database User
Go back within the MySQL Databases section and then add a database user, I normally call this whatever the database title is plus user, or something that makes it easy to identify. You will also be asked to create a password for this user, I always use the password generator for security purposes. Once created it will lead you to the screen that says something to the extent of: Added user “xxxxxx_xxxx” with password “xxxxxxxxx”. Be sure and save these as well as you will need them. Once done, go back and add the user to the database. It will bring you to a screen where it will ask what privileges you would like the user to have. I personally always give the user all access. At this point you are done in c-panel, so go ahead and close that and head back to the domain where you uploaded WordPress.
Create a wp-config.php file
Once back at the domain you will see that it now says “There doesn’t seem to be a wp-config.php file. I need this before we can get started.” – Go ahead and click through to create it. You have the database name, the username and the password as they where what you saved when you set them up within c-panel so go ahead and enter them in now. If done correctly you will be lead to a screen where it will say “Run the Install”, so make it happen.
Finishing the Installation
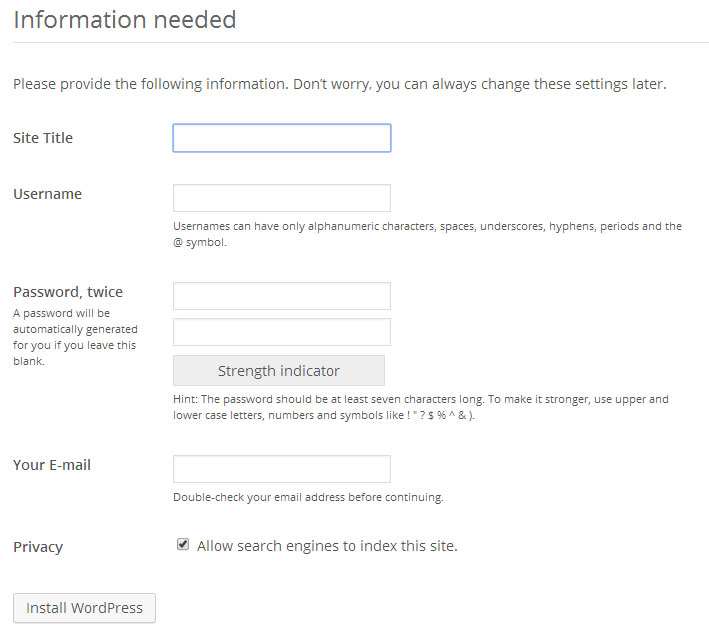 It only asks you a few questions here but they are important. You will need the websites name, the username and the password to make it happen. Be sure to save the username and password as they are what is needed for everytime that you are logging into WordPress. You are basically setting up the main admin account here. You will also need an email for security purposes such as alerts and retrieving your password should you have problems. Once entered it will bring you to the log-in page where you will enter that username and pass for the first time. Set-Up Complete!!!!
WordPress words of advice.
Once I am in the dashboard for the first time I have a tendency to change a few things real quick. I go to settings > general in the left navigation and quickly change the tag line to what I want as well as the timezone to where the site is located. Any changes here and you need to go to the bottom of the page and hit save. I also always go to settings > permalinks real quick and set that to postname for a nice and SEO friendly permalink structure. That is it, you are ready to make a monster, have at it.
I also created a short little 10 minute video which shows how to do this step by step. Very simple and goes through exactly what I have written in the above article.